FCP X claims Native AVCHD Support, the real meaning is Final Cut Pro X will still not import a stand-alone AVCHD video file, and importing AVCHD still requires access to the original AVCHD camcorder, or a valid Camera Archive disk structure. As we know Final Cut Pro X has a highly reliable camera import feature that supports AVCHD files, you must import MTS files directly from the camera, from a memory card (with the original file structure in place), or from a camera archive. That to say Final Cut Pro X fully supports AVCHD, but it is not possible to import single MTS files.
This is a pain for many people who just import single MTS file. Is any possibility for us to solve these problems? Yes, you need to convert them to FCP more friendly formats before you try to import MTS to FCP X. I`d recommend you to use iFastime Video Converter Ultimate for Mac, a professional video converter, it can help convert MTS to Prores codec like Apple ProRes 4444 XQ, Apple ProRes 4444, Apple ProRes 422 HQ, Apple ProRes 422, Apple ProRes 422 LT, Apple ProRes 422 Proxy that FCP X recognizes. With the built-in editor, you can trim or crop your videos, add subtitles and watermarks to the videos as well.
Note: If you are using FCP X, please make sure you have installed ProApps QuickTime Codecs. After installation, you can follow these steps to transcode MTS file to Prores for FCP X.
Free Download or Purchase iFastime Video Converter Ultimate for Mac:


Other Download:
- Cnet Download: http://download.cnet.com/iFastime-Video-Converter-Ultimate/3000-2194_4-76448683.html
- Top 4 Download: http://www.top4download.com/ifastime-video-converter-ultimate-for-mac/hekvsosm.html
- WinSite Download: http://www.winsite.com/Multimedia/Video/IFastime-Video-Converter-Ultimate-for-Mac/
- Softonic Download: http://ifastime-video-converter-ultimate-for-mac.en.softonic.com/mac
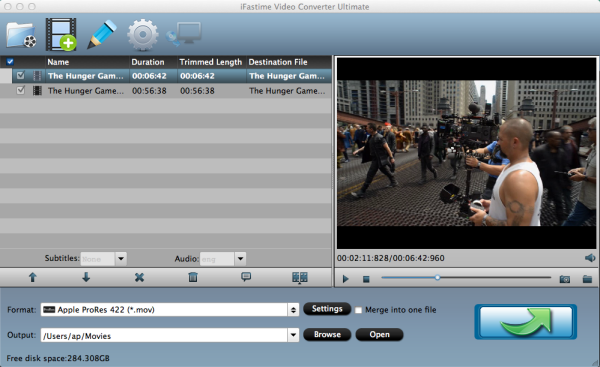
Step 1: Add MTS video files
First of all, download MTS file converter on Mac and then launch it. Connect your AVCHD camcorder to Mac, copy the MTS files to your hard disk, and then import .mts files. You can directly drag and drop video clips to file converter. You can also batch conversion at one time.
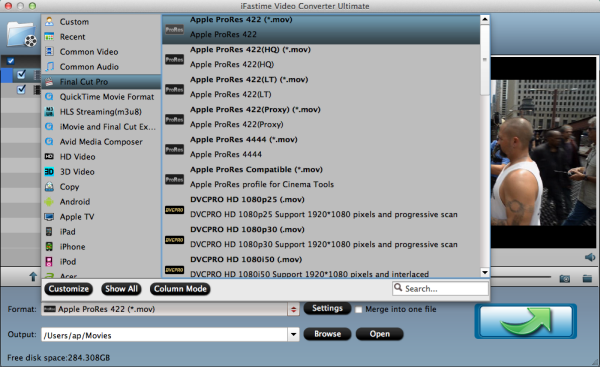
Step 2. Select an output video format
You can choose FCP X friendly format, or directly choose "Final Cut Pro Apple ProRes 422 (*.mov)" as the output format.
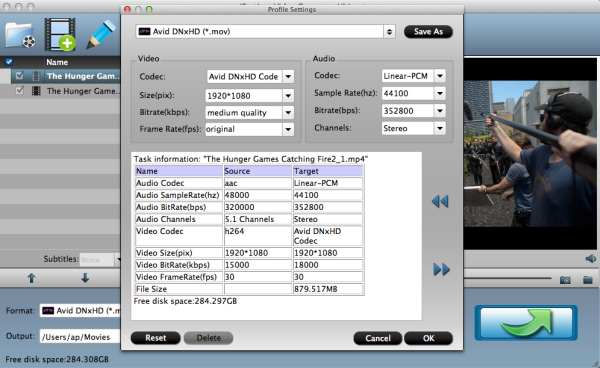
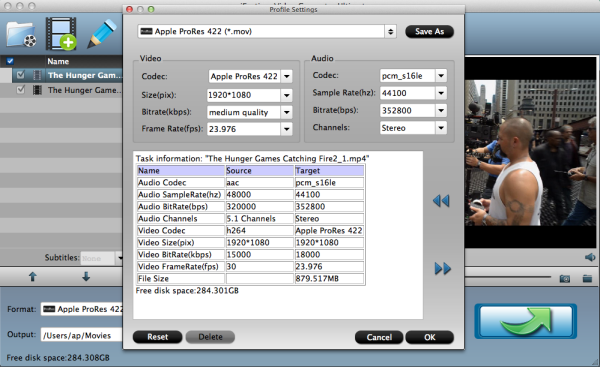
Tip: In case the default settings do not fit your requirement, you can click "Settings" button and enter "Profile Settings" panel to adjust video size, bit rate, frame rate, sample rate and audio channels.
Step 3. Finally, click the "Start conversion" button to convert MTS to FCP friendly formats on your Mac El Capitan.
After conversion is complete, click “Open” you can import converted MTS files to FCPX for further editing without problem. Then share the funny movie or video to YouTube with friends.
Note: This MTS Video Converter for Mac Supports MTS files from a variety of HD camcorders like: Canon VIXIA HF200, Canon FS200, Canon VIXIA HFS100, Canon VIXIA HG21, Panasonic HDC-HS300, Panasonic HDC-HS20, Sony HDR-CX100, Sony DCR-SR47, JVC GZ-HD40, JVC GZ-HD10 etc.
Have more questions about how to work with MTS in FCP X, please feel free to contact us>> or leave a message at Facebook.
More Topics: